
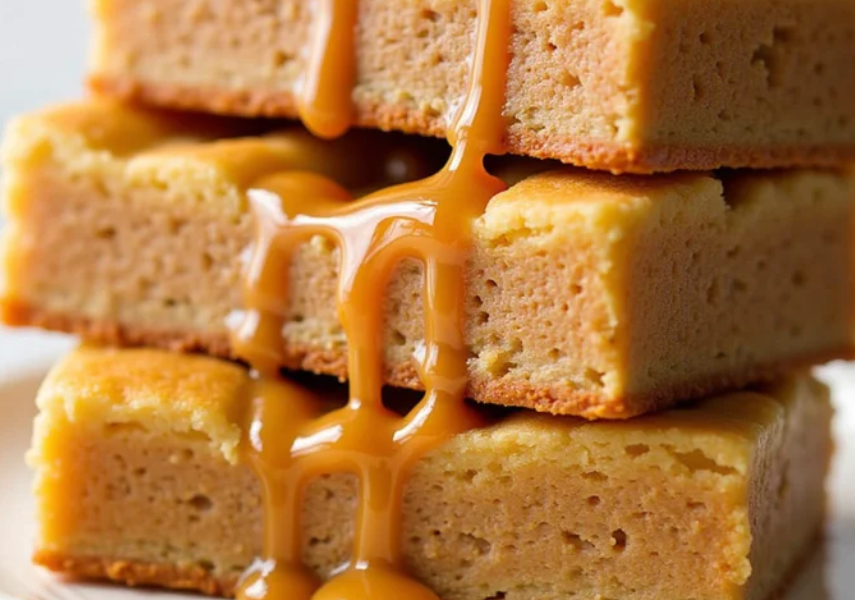
The Ultimate Guide to Perfect Homemade Maple Donut Bars
Let’s be entirely honest with each other for a second: there is something deeply magical about walking into a local bakery early in the morning. The smell of fresh dough, warm sugar, and hot coffee hitting the air is enough to make anyone forget about their diet. And if you scan the pastry case, past the jelly-filled treats and the classic sprinkled rings, your eyes will almost always land on the undisputed king of the top shelf: the maple bar.
Known across different parts of the world as a maple bar, a Long John, or simply a maple-glazed finger donut, this pastry is an absolute legend. It’s elongated, it’s pillowy-soft, and it’s smothered in a thick, sweet, aromatic glaze that threatens to get all over your fingers with every single bite.
But why should you have to change out of your pajamas and drive to the local bakery just to satisfy that morning craving? Making homemade maple donuts is not only incredibly rewarding, but it also fills your entire house with an aroma that no scented candle could ever hope to replicate.
If you’ve ever been intimidated by the thought of working with yeast dough or frying at home, take a deep breath. This is the best maple bar recipe you will ever find, written specifically to take the guesswork out of the process. We are going to break down the science of the perfect rise, the secret to a glaze that sets with a beautiful glossy sheen, and how to get that signature light-as-air texture. Grab your rolling pin, clear off your kitchen counter, and let’s master the art of the perfect sweet treat!
Yeast vs. Cake: Understanding the Anatomy of a Great Donut
Before we start measuring out our flour and cracking our eggs, we need to address a fundamental question in the world of donut making: are we making a yeast donut or a cake donut?
For a true, authentic Maple Donut Bars experience, we must absolutely go with a yeast-raised dough. A cake-style maple bar just doesn’t hit the same notes. We want that classic, stretchy, melt-in-your-mouth bite that can only be achieved when yeast interacts with flour proteins to build a beautiful web of gluten. When that air-filled dough hits hot oil, the small pockets of gas expand rapidly, creating a donut that is crisp on the outside but feels like a fluffy cloud on the inside.
The Chemistry of an Enriched Yeast Dough
To get the best maple bar recipe results, we use what bakers call an enriched dough. A standard bread dough usually consists of just four basic ingredients: flour, water, yeast, and salt. An enriched dough, however, takes things a step further by introducing fats, dairy, and sugar—specifically milk, butter, and egg yolks.
Here is why this chemistry matters for your donut:
- The Milk: Instead of water, we use warm whole milk. The proteins and sugars in milk soften the gluten structure, resulting in a much more tender crumb.
- The Butter: Fat coats the gluten strands, preventing them from becoming too tough or chewy. This ensures your donut tears apart effortlessly rather than pulling like a piece of sourdough bread.
- The Egg Yolks: Lecithin, a natural emulsifier found in egg yolks, binds the fats and liquids together seamlessly. This creates a rich flavor and helps the dough retain its shape during the frying process.
Ingredients Checklist: Everything You Need
The beauty of making an easy yeast donut recipe is that the ingredient list is composed entirely of everyday kitchen staples. There are no strange stabilizers or chemical preservatives here—just pure, honest ingredients.
For the Fluffy Donut Dough:
- 4.5 cups All-Purpose Flour: Provides the perfect amount of protein structure without making the donuts tough.
- 1 packet (0.25 oz / 7g) Active Dry Yeast: The engine that drives our rise.
- 1 cup Whole Milk: Warmed to roughly 105°F to 110°F (40°C).
- 1/3 cup Granulated Sugar: Just enough to feed the yeast and add a subtle sweetness to the dough itself.
- 1/2 cup (1 stick) Unsalted Butter: Melted and cooled slightly.
- 2 Large Eggs: Room temperature is best so they don’t shock the warm milk.
- 1 tsp Fine Sea Salt: Crucial for balancing the sugars and waking up the overall flavor profile.
For the Ultimate Maple Glaze for Donuts:
- 3 cups Powdered Sugar: Sifted to ensure there are absolutely no lumps.
- 1/3 cup Pure Maple Syrup: Go for Grade A Dark Color for the strongest, richest natural maple flavor. Avoid pancake syrup, which is just colored corn syrup!
- 3 tbsp Unsalted Butter: Melted. This adds richness and helps the glaze set firmly.
- 1 to 2 tsp Maple Extract: This is the secret weapon that gives the glaze that punchy, nostalgic bakery intensity.
- 2 to 3 tbsp Heavy Cream or Milk: To adjust the consistency until it is perfectly pourable but thick.
Step-by-Step Kitchen Walkthrough
Buckle up! It’s time to head to the kitchen and turn these basic ingredients into golden, glazed perfection. Follow these steps precisely, and you’ll be amazed at what you can achieve.
Step 1: Wake Up the Yeast
Think of yeast as a sleeping giant. To wake it up, you need the perfect environment: warmth and food. In the bowl of your stand mixer (or a large mixing bowl), combine your warm whole milk, a tablespoon of your granulated sugar, and the packet of active dry yeast. Give it a gentle stir and let it sit undisturbed for about 5 to 10 minutes.
Natasya’s Diagnostic Tip: After a few minutes, look at the surface of the milk. It should look frothy, bubbly, and smell distinctly like fresh bread. If your milk remains completely flat and clear, your yeast is likely dead (usually because the milk was too hot or the yeast was expired). If this happens, dump it out and start over with fresh yeast. Don’t waste your flour on dead yeast!
Step 2: Mix and Knead the Dough
Once your yeast is nice and foamy, add the rest of your granulated sugar, the melted butter, room-temperature eggs, and sea salt. Whisk gently to combine.
Attach the dough hook to your mixer and turn it to low speed. Gradually add your all-purpose flour, one cup at a time. The mixture will transition from a wet batter into a soft, sticky dough that begins to pull away from the sides of the bowl.
Let the mixer knead the dough on medium-low speed for about 5 to 7 minutes. If you are kneading by hand, turn the dough onto a lightly floured surface and work it vigorously for about 10 minutes. You are looking for a dough that is smooth, elastic, and slightly tacky to the touch, but not sticking completely to your fingers.
Step 3: The First Rise (The Patience Phase)
Form the dough into a smooth ball. Lightly grease a large bowl with a tiny bit of neutral oil, place the dough ball inside, and turn it over once so the top is lightly coated in oil.
Cover the bowl tightly with a clean kitchen towel or plastic wrap. Place it in a warm, draft-free spot in your kitchen and let it rise for about 1 to 1.5 hours, or until it has completely doubled in size.
Step 4: Shape the Maple Donut Bars
Once your dough has beautifully puffed up, gently punch it down right in the center to release any large air bubbles. Turn the dough onto a lightly floured work surface.
Using a rolling pin, roll the dough out into a large rectangle that is roughly 1/2 inch thick.
Using a sharp pizza cutter or a chef’s knife, cut the rectangle into uniform bars. The ideal size for a classic bakery look is about 2 inches wide by 5 inches long. Gather any leftover scraps of dough, gently press them back together, let them rest for 5 minutes, and roll them out again to cut your final remaining bars.
Step 5: The Second Rise
Line two large baking sheets with parchment paper and dust them lightly with flour. Carefully transfer your cut donut bars onto the sheets, leaving at least an inch of space between them.
Cover them loosely with a damp kitchen towel or a sheet of plastic wrap that has been sprayed with non-stick cooking spray (so it doesn’t stick to the rising dough!). Let the bars rise for a second time for about 30 to 45 minutes. They should look incredibly puffy, delicate, and look like they would leave a gentle indentation if you touched them lightly.
Step 6: Frying to Golden Perfection
While your donuts are finishing their second rise, it’s time to prep your frying station. Fill a large, heavy pot (a cast-iron Dutch oven is absolutely perfect for this) with about 3 inches of neutral, high-smoke-point oil, such as canola, vegetable, or peanut oil.
Clip a deep-fry thermometer to the side of the pot and heat the oil over medium heat until it reaches exactly 350°F (175°C). Keeping your oil at the correct temperature is the absolute secret to donut success!
Carefully slide 2 or 3 donut bars into the hot oil at a time. Do not overcrowd the pot, as this will drop the oil temperature significantly. Fry the donuts for about 1.5 to 2 minutes on the first side until they are a gorgeous, uniform golden brown. Use a slotted spoon or metal tongs to gently flip them over and fry for another 1.5 minutes on the second side.
Remove the golden bars from the oil and transfer them immediately to a wire rack set over a baking sheet or a platter lined with paper towels to drain any excess oil. Let them cool down for at least 10 minutes before glazing. If you try to glaze a piping-hot donut, the glaze will melt completely and run right off!
Fried vs. Baked: Can You Make These in the Oven or Air Fryer?
While traditional purists will always argue that a true bakery-style donut must be fried, you can absolutely adapt this dough recipe for lighter cooking methods if you prefer to skip the vat of bubbling oil.
The Baked Method
If you want to bake your old-fashioned donut bars in the oven, follow all the preparation and shaping steps exactly as written. Once your bars have completed their second rise on the parchment-lined baking sheet, preheat your oven to 375°F (190°C). Bake the bars for 12 to 15 minutes until the tops are a light golden brown. The texture will be slightly more bread-like and reminiscent of a sweet brioche bun, but once smothered in the maple glaze, they are still utterly fantastic!
The Air Fryer Method
Your air fryer can deliver a wonderful middle-ground texture that mimics the crisp exterior of a fried donut without the excess fat.
- Preheat your air fryer to 350°F (175°C).
- Lightly grease the air fryer basket with a high-smoke-point oil spray.
- Carefully place 2 or 3 risen donut bars into the basket, ensuring they do not touch.
- Air fry for 3 to 4 minutes, flip them over, and fry for an additional 2 to 3 minutes until they are golden brown. Basting them with a tiny bit of melted butter right after they leave the air fryer will give them that rich flavor you crave!
Mastering the Perfect Glossy Maple Glaze
The dough is the vehicle, but let’s be completely honest: the maple glaze for donuts is the true star of the show here. A bad glaze can ruin a perfect donut, but a flawless glaze makes you feel like a culinary genius.
To make the glaze, combine your sifted powdered sugar, pure maple syrup, melted butter, and maple extract in a wide, shallow bowl (a wide bowl makes dipping the long bars incredibly easy!). Whisk everything together while gradually adding your heavy cream, one tablespoon at a time.
You want a consistency that is thick, velvety, and flows off your whisk like thick ribbons of lava. If it’s too thin, it will look translucent on the donut. If it’s too thick, it will tear your delicate donuts apart when you try to dip them.
The Dipping Technique
Take a cooled donut bar and hold it gently by its short ends. Lower the top surface of the donut directly down into the maple glaze, submerging it about halfway up the sides. Lift the donut straight up, hold it over the bowl for a few seconds to let any excess glaze drip off, and then flip it right-side up onto a wire cooling rack.
Allow the glaze to stand undisturbed for about 10 to 15 minutes. As it cools, the sugars and melted butter will form a thin, crackly, shiny shell that locks in the moisture of the donut underneath.
Fun Variations to Spice Up Your Batch
While a plain maple bar is an absolute work of art on its own, it’s also an incredible canvas for customization. Here are three fun ways to take your batch to the absolute next level:
- The Maple Bacon Bar (The Ultimate Savory Twist): This is a modern gourmet staple. While your glaze is still wet, generously sprinkle the top of the donut with crisply fried, finely chopped bacon bits. The smoky, salty crunch of the bacon paired with the rich sweetness of the maple is a flavor profile that will absolutely blow your mind.
- The Toasted Maple Pecan: Toss half a cup of chopped pecans into a dry skillet over medium heat for 3 minutes until fragrant. Sprinkle them over your freshly glazed donuts for a beautiful texture contrast that feels perfect for autumn.
- The Custard-Filled Long John: Want to get fancy? Use a long Bismarck piping tip to inject the center of your fried donut bars with a rich vanilla pastry cream or simple whipped cream before dipping the top into your maple glaze. It’s an explosion of creamy texture in every single bite!
Storage and Reheating: Keeping the Softness Alive
Yeast-raised donuts are at their absolute peak of perfection within the first few hours of leaving the hot oil. However, if you have leftovers, you can easily preserve them for later.
Room Temperature Storage
Store your glazed Maple Donut Bars in a single layer inside a clean cardboard bakery box or a large plastic container with the lid slightly cracked. Avoid sealing them completely airtight while they are fresh, as the trapped moisture can cause the sugary glaze to become sticky, wet, and weep. They will stay soft for up to 2 days at room temperature.
Freezing for Long-Term Cravings
You can freeze unglazed fried donuts beautifully! Let them cool completely, wrap them tightly in plastic wrap, and store them in a heavy-duty freezer bag for up to 2 months. When you are ready to eat, let them thaw at room temperature, pop them in a warm oven for 3 minutes to refresh the dough, and then dip them in a fresh batch of warm maple glaze.
The 8-Second Reheating Miracle
If you are eating a day-old maple bar that has gone slightly firm, do not despair. Place the donut on a microwave-safe plate and microwave it on high power for exactly 8 to 10 seconds. This brief flash of heat instantly softens the fat molecules in the enriched dough, making it incredibly warm, fluffy, and pillowy once again—just like it was fresh from the bakery!
Frequently Asked Questions (FAQ)
Can I use instant yeast instead of active dry yeast?
Yes, absolutely! If you are using instant yeast (sometimes called rapid-rise yeast), you can skip the step of proofing it in the warm milk. Simply toss the dry yeast directly into the bowl with your flour and other dry ingredients, add your warm milk mixture, and begin kneading immediately. Your first rising time will also likely be a bit faster, closer to 45 to 60 minutes.
Why didn’t my donuts form that classic light line around the middle?
That beautiful, pale white line running around the center of a fried donut is a badge of honor for bakers! It means your dough was perfectly aerated and light. Because the dough was filled with tiny air pockets, it floated high on top of the oil rather than sinking down deep. If your donuts don’t have that line, it usually means they didn’t rise quite long enough during their second proofing stage, or your dough was slightly too heavy and dense. They will still taste incredible, though!
My glaze keeps soaking into the donut and disappearing. What am I doing wrong?
This is a classic problem that happens when you try to glaze your pastries too early. If the donut bars are still warm from the fryer, the heat will melt the sugars in your glaze, causing the dough to absorb it like a sponge. Make sure your donuts have cooled down to a comfortable room temperature before you start dipping!
Final Thoughts: Welcome to the Home Bakery Lifestyle
There is something deeply satisfying about mastering a classic bakery pastry in your own home kitchen. It demystifies the cooking process and proves that with a little bit of patience, some simple science, and high-quality ingredients, you can rival the flavors of any commercial donut shop in town.
These Maple Donut Bars strike the perfect balance between comfort and gourmet elegance. The stretchy, soft enriched dough creates a cloud-like base that perfectly offsets the intense, sweet, toffee-like complexity of our signature real maple glaze. It is a recipe designed to turn a standard weekend morning into an absolute celebration.
So, forget the drive-thru lines and the stale pastries sitting under heating lamps. Clear off your counter space, turn on your stove, and get ready to create the most incredible, golden, fluffy homemade donuts your family has ever tasted.
Enjoy every single sweet, sticky bite, friends! Happy baking! 🍩✨